

If you have read my previous post - I have compared several key international brokers before ultimately deciding to go with TradeStation Global (TSG), at least back then before the July 2021 Inactivity Fee removal by Interactive Brokers
TradeStation Global basically acts as an introducer for Interactive Brokers (IBKR), charging a slight premium in pricing tier / commissions, but leverages IBKR's existing backbone and infrastructure when it comes to trading and fund management.
As such, this post will be solely focusing on TradeStation Global and Interactive Brokers. In case if you want to better understand on my broker selection process, feel free to read my previous posting on my journey on choosing the "right" International Brokerage.
Whilst this guide is written with context for Malaysians, it is pretty much the same even if you're from other countries - perhaps with even better access to market or possibility of transferring fund without involving TransferWise / Foreign Transfers!
Without further ado, let's get started!
UPDATE 9 JULY 2021: With Interactive Brokers removing the monthly inactivity fee, it makes more sense to skip TradeStation Global and just apply a native IBKR PRO account. Most benefits listed below are still applicable for IBKR, with addition of even lower commissions and fractional shares. Check out the article with step-by-step guide in opening an IBKR PRO account here: Beginner's Guide: Investing Abroad via Interactive Brokers from Malaysia
Just a quick recap, TradeStation Global was selected because of the following key benefits - which most of them were made possible thanks to their partner Interactive Brokers.
Again, if you are interested with the details, head to my previous post
Truth to be told, the whole application process was very confusing for me at first. Throughout the journey I kept asking myself - "am I doing this right? I was supposed to open a TradeStation Global account but why does everything surrounding the form says Interactive Brokers? Why are there no email notifications?"
Although I was aware that TradeStation Global was merely an introducer, I did not expect that they are literally leveraging Interactive Brokers' backbone to such extent. Thankfully, their website have a good 5-steps summary which helped me to stay on track.
For simplicity sake, I will re-sequence / modify some of the steps above to group things logically.
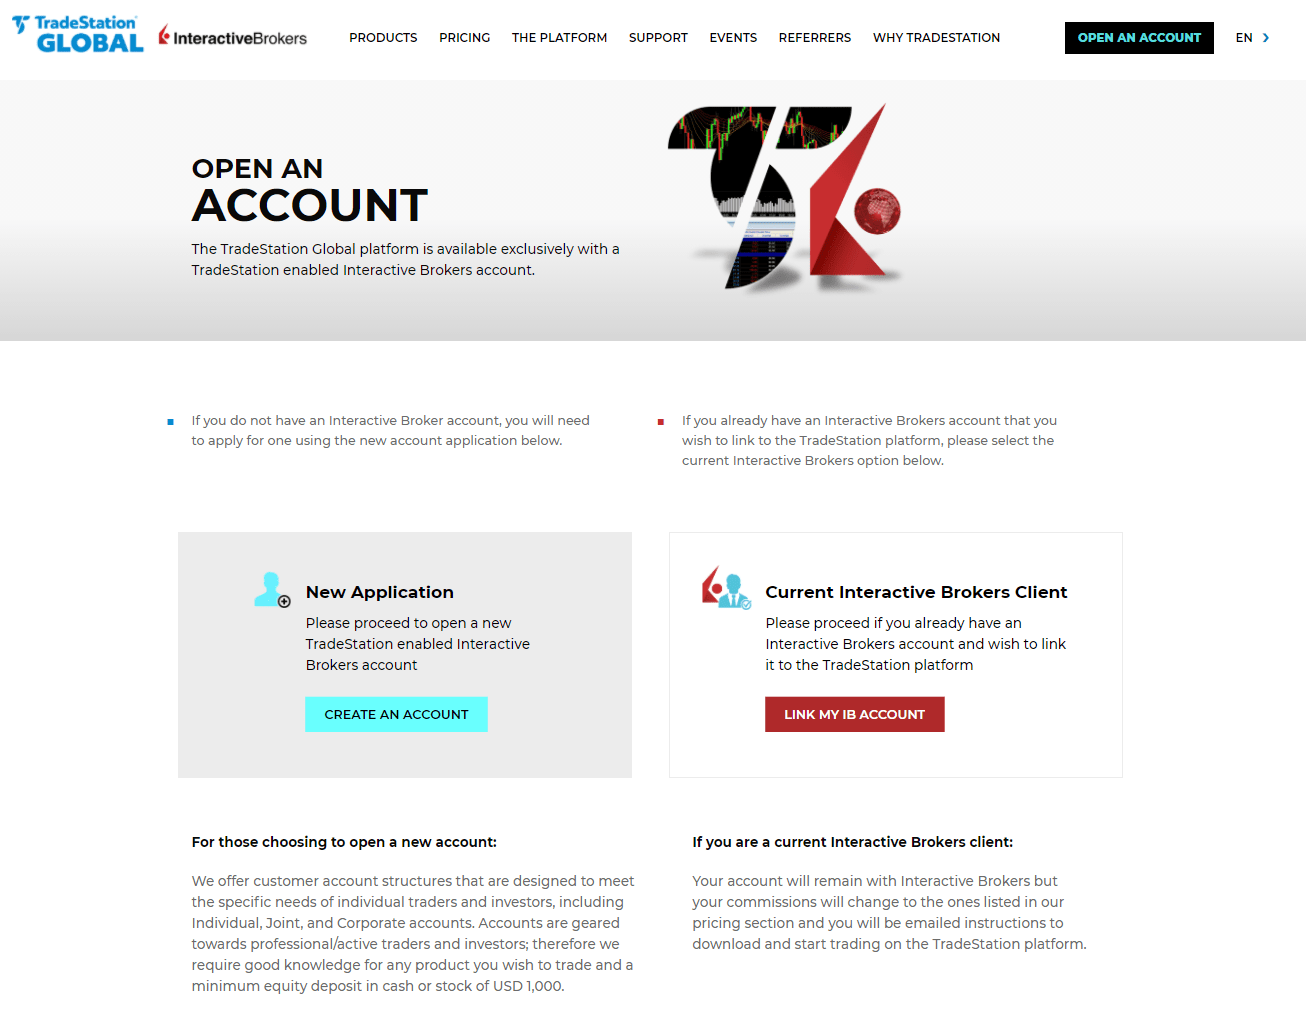
You just need to head to TradeStation Global's website and click on Open An Account, which basically will present you with two options - to Create New Account or Link Existing IBKR Account
If you already have an existing IBKR account and would like to convert to TradeStation's commission model - do consult and check with TradeStation support just to make sure that the minimum holdings is now switched from $100K USD to $2500 USD (for monthly fees waiver) as I have no prior experience on this. But it does seem pretty simple and you only have one form to fill up.
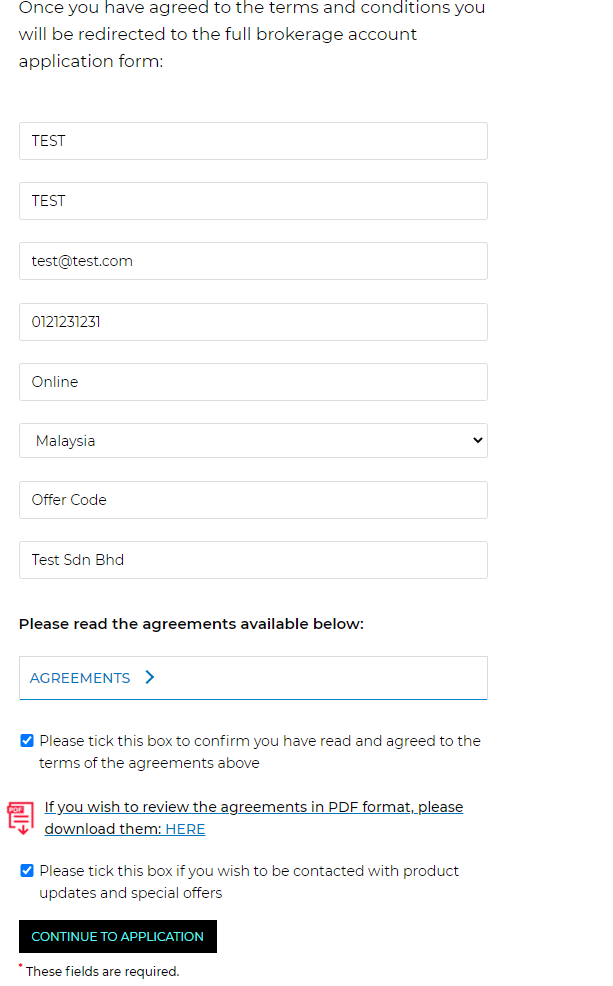
For this guide, we will primarily be focusing on new clients so go ahead and click on 'Create An Account' and then complete the form via Open An Account page.
Upon submission, you should find yourself rerouted to Interactive Brokers website to complete the rest of the application process.
P/s in case if you’d like to support me, feel free to use my referral link to sign up and mention 'RinggitFreedom.com' in the registration form ("Where did you here about us?")
UPDATE 9 JULY 2021: With Interactive Brokers removing the monthly inactivity fee, it makes more sense to skip TradeStation Global and just apply a native IBKR PRO account. Follow this guide to learn more: Beginner's Guide: Investing Abroad via Interactive Brokers from Malaysia.
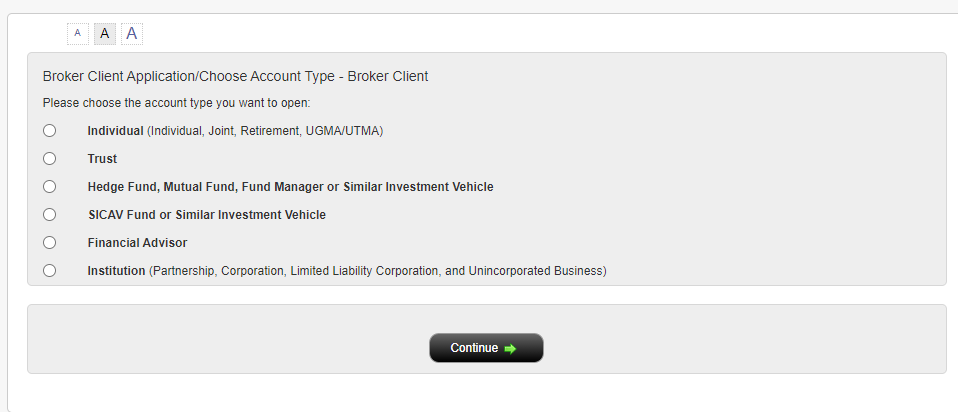
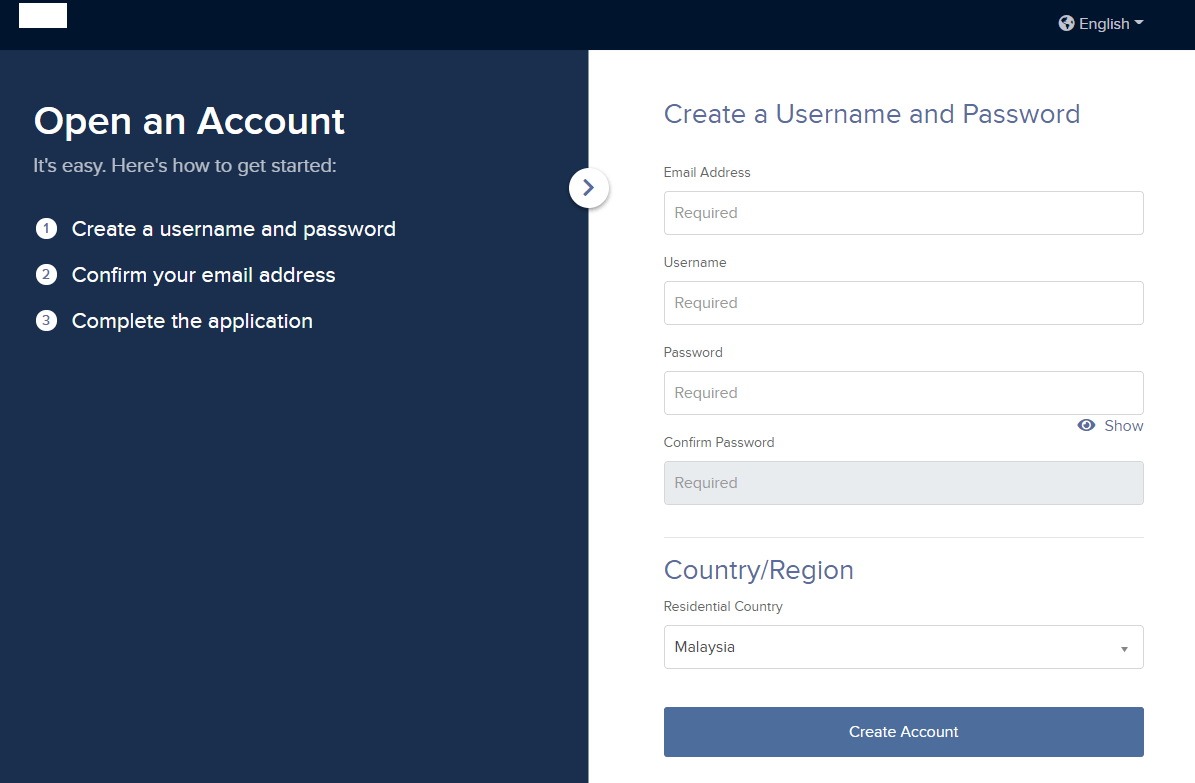
Once you've landed on Interactive Brokers site, there's only three things to do in this step.
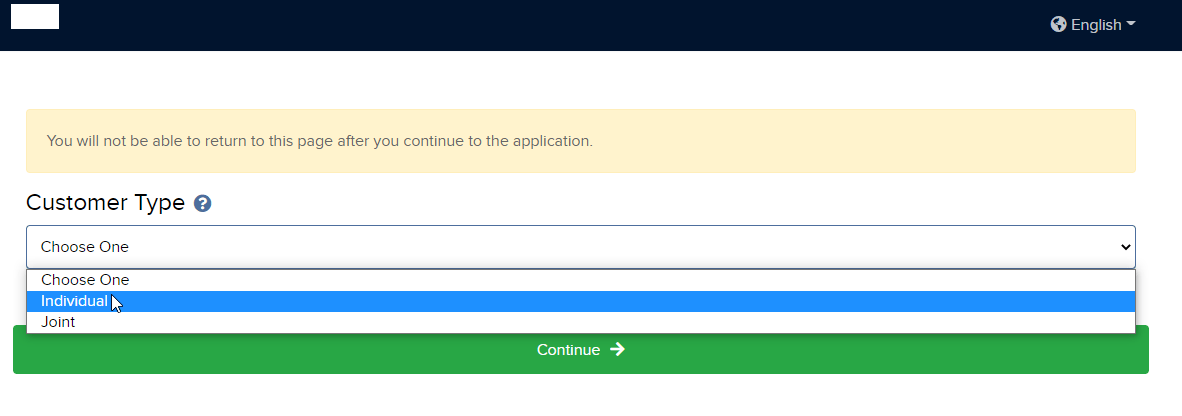
Firstly, select your account type. This guide would be mostly focusing on Individual Investor like myself so go ahead and pick it. If you are registering as other account types, there might be subtle differences in the registration process but I believe it would be mostly similar.
Secondly, you will be routed to a page to create your username, email, and password. This is basically your credentials during the application process, and your trading account moving forward (upon approval)
Thirdly, you should receive an email by now to validate your email address, just click on it and it should complete the email verification process and viola! you have successfully created your IBKR account.

Note: Once you have created your username / password, REMEMBER IT! You will need it later to resume your application, or check on its status - by logging in directly via Interactive Brokers with the above credentials. This username / password will also be your key to access the trading platform after your application approval.
If you have just completed the email verification step, there should be a login window for you to key in your username and password. Alternatively, head to Interactive Brokers website and click on Login - it's the same.
After logging in, you will need to select your investment account type - which in my case was Individual. One potential use case for Joint Account (which I hasn't explored yet) was to leverage it for estate planning purposes (read more).
I won't go too much into details here - it's just a tons of form to fill up. But instead, I'll highlight a few key points and common mistakes to make sure you DON'T MISS IT.
There's always confusion when it comes to TIN. Some thinks that Malaysia doesn't have one but it is wrong.
All Malaysian / Tax Residents whom are liable to report personal income tax will definitely have TIN - it's basically your LHDN Tax File Number.
Don't ever skip this otherwise it might be deemed as attempt to escape taxes (though we Malaysians are lucky to have 0% capital gain tax).
If you have multiple tax residency, make sure you highlight them as well. If in doubt, consult your tax agents.
Their preferred verification method for Malaysian seems to be our NRIC - which is good. Just select it and upload your copy of IC later.
This is another area most people (myself included) get confused. From my experience it serves mainly two purposes:
IMPORTANT: Remember your base currency - as it'll be one of the important point shown later during funding in / currency conversion processes
Always go for Cash Account option - unless you know what you're doing. Again, to re-iterate, never ever trade with other people's money unless you know what you are doing.
Leverage is a double-edged sword as it can amplify both your returns and losses.
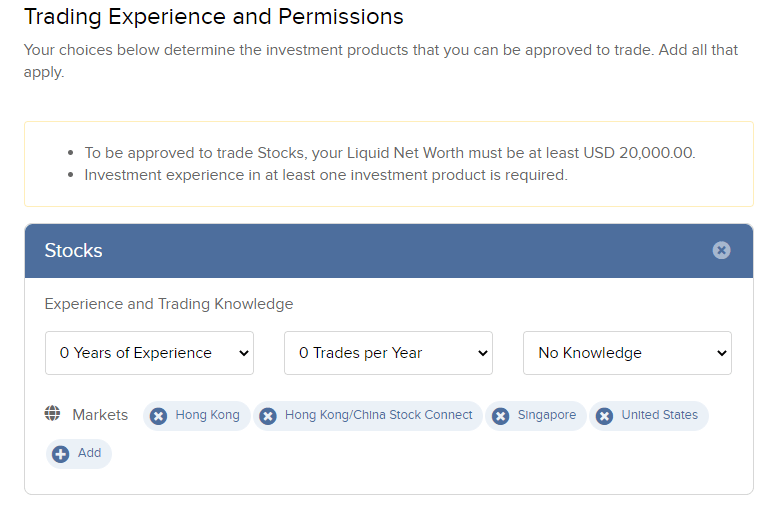
Choose the minimum permissions you need - you can always revisit and add more later. Personally I just went with Stocks for US, Hong Kong, China and Singapore. Note that they requires investor with at least sound knowledge before approving your trade permissions.
Make sure to double check and ensure that all your information populated are as accurate as it is - before you sign them off. Once you signed all the agreements, you'll automatically be moved to the Application Status page and no further modifications can be made at that point unless you contact IBKR support.
Once you have completed all the forms and signed all the agreements, you should be able to see your application status page where you need to submit supporting documents, fund your account, or verify your mobile number.
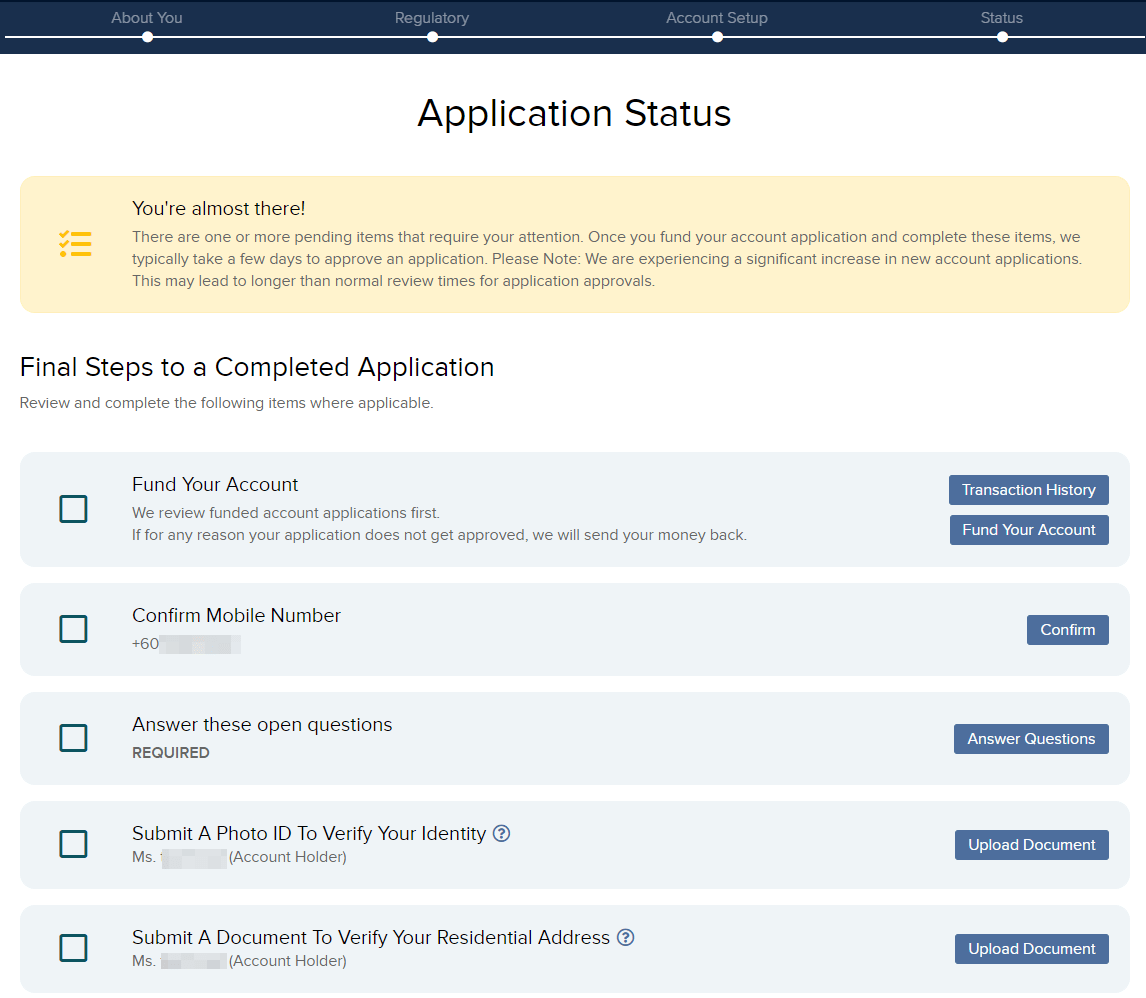
Depending on information provided earlier, there may be additional questions asked in this stage - for example, if they needed a better understanding on your income sources.
From my personal experience, with funding my account but 1x rejection (due to unaccepted address verification document), the entire application process took me close to 4-5 working days, which could've been shorter if I hasn't get rejected to begin with.
Of all the steps - this is the part which are the most confusing and frustrating for me.
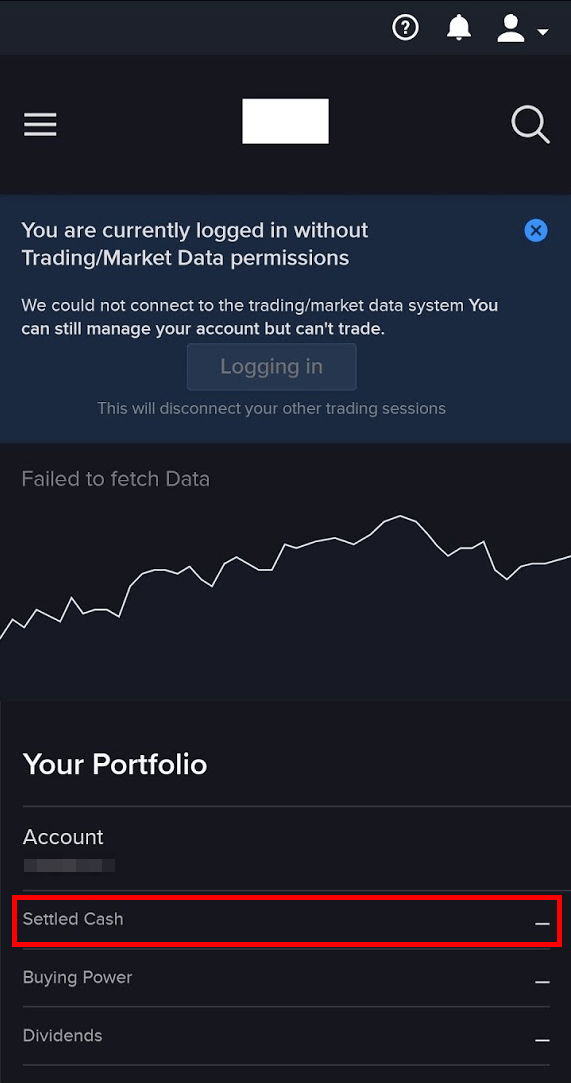
However, nothing was in the website and I cannot perform any activity, and my funds (previously funded during application process) is also not showing up.
The worst part was - I don't see the monies which I funded in
Took me awhile to realise - but this is basically for you to login into TSG Desktop Application should you choose to use their app (instead of IBKR Trader Workstation, IBKR Mobile Application, or IBKR Web Client).
When attempting to login directly to Interactive Brokers website, I still do not have trading permissions (and not able to login to mobile/desktop app)
Thankfully, at least it started to show signs that my monies are indeed there... Whew!
There wasn't any "official welcome email" or "completed account opening notification" which made the whole experience confusing.
Bottom line is - once you're able to login into IBKR Web and IBKR Mobile Application, with your cash "settled in", you're good to go!
Before getting into the nitty-gritty of the fund transfers, let me first highlight the high levels on a few possible methods to fund your foreign investments:
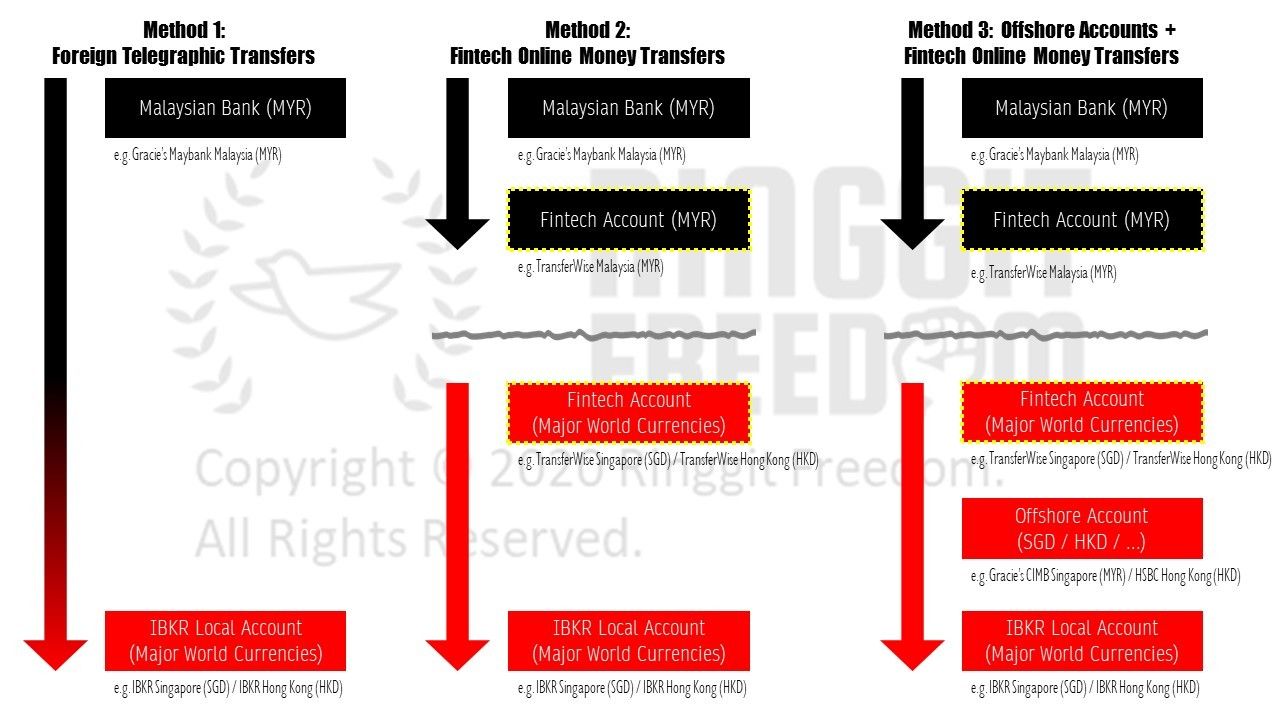
In a nutshell, there are 3 common approaches when it comes to foreign transfers:
I will dive into the details on the differences in above 3 methods in my future postings, but I generally recommend to avoid method 1 due to excessive foreign transfer handling fees and mark-up exchange rates.
Either Method 2 or Method 3 will be fine, as both relies on intermediary such as the likes of TransferWise or InstaRem providing competitive exchange rates (compared to traditional banks) to move funds across borders. You can also read more about it in my another blog post here: Wise vs. InstaRem? Which are better for Malaysians?
p/s in case if you'd like to support me, feel free to use my Wise referral code for free first transfer!
I generally prefers Method 3, since it helps to ensure that all deposits into foreign brokers will always be under my own name (to keep money trails clean). Whilst you don't need an offshore account to invest internationally, I strongly recommend you to open one in case of future withdrawals as it would be the most efficient way to withdraw from IBKR.
IBKR allows withdrawal to Malaysia Banks in MYR directly, but be prepared for hefty fees charged by intermediary banks together with marked-up exchange rates! One closest possible way is to withdraw through SGD via Singapore banks, before transferring back to Malaysia via TransferWise/FinTech - and Singapore happens to be one of the easiest way for Malaysians to open a Singapore bank account without leaving the country.
Personally, I have access to both Singapore bank account (as summarised above) and Hong Kong bank account (due to my previous expatriation).
Once you have decided the approach you'd want to take on funding your Interactive Brokers account, you simply have to notify them of a deposit, receive banking instructions, and complete the transfer within 60 days of notification.
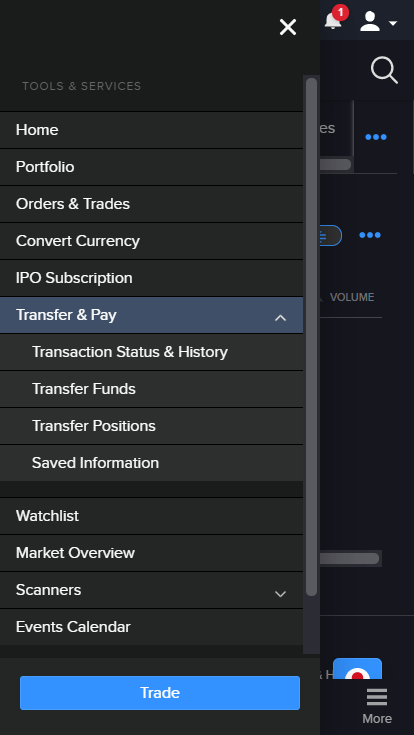
If your account application hasn't been approved, you can see the "Fund Your Account" in your Application Status dashboard. Otherwise, if you already have a fully-activated account, just log-in and access "Transfer & Pay" section to find the same button.
Select your corresponding fund-in currency. I'll be using SGD in this example since it is one of the Offshore account that I currently own.
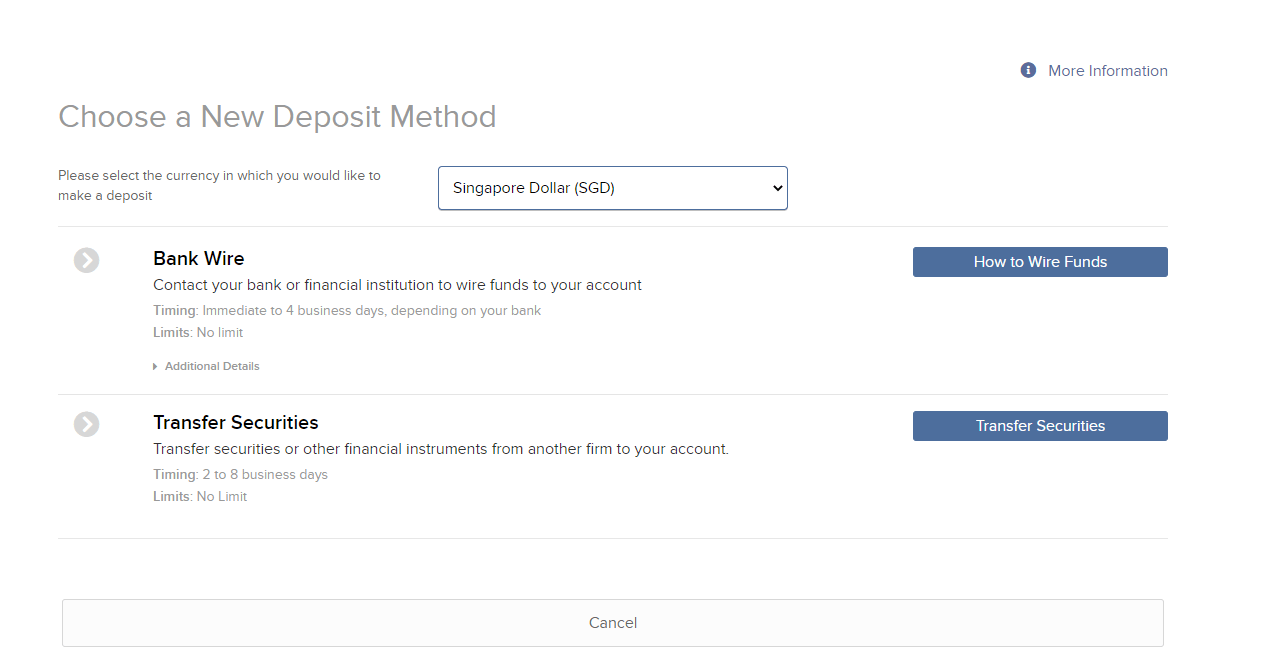
You'll be prompted to input the sender's institution details and your bank account number. Generally I'd also recommend to "Save bank information" so that I do not have to populate this information again in the future, as the account nickname/details will appear in my "Favourites" for immediate selection. Ensure that the amount input here will be an exact match to the amount you transfer later.
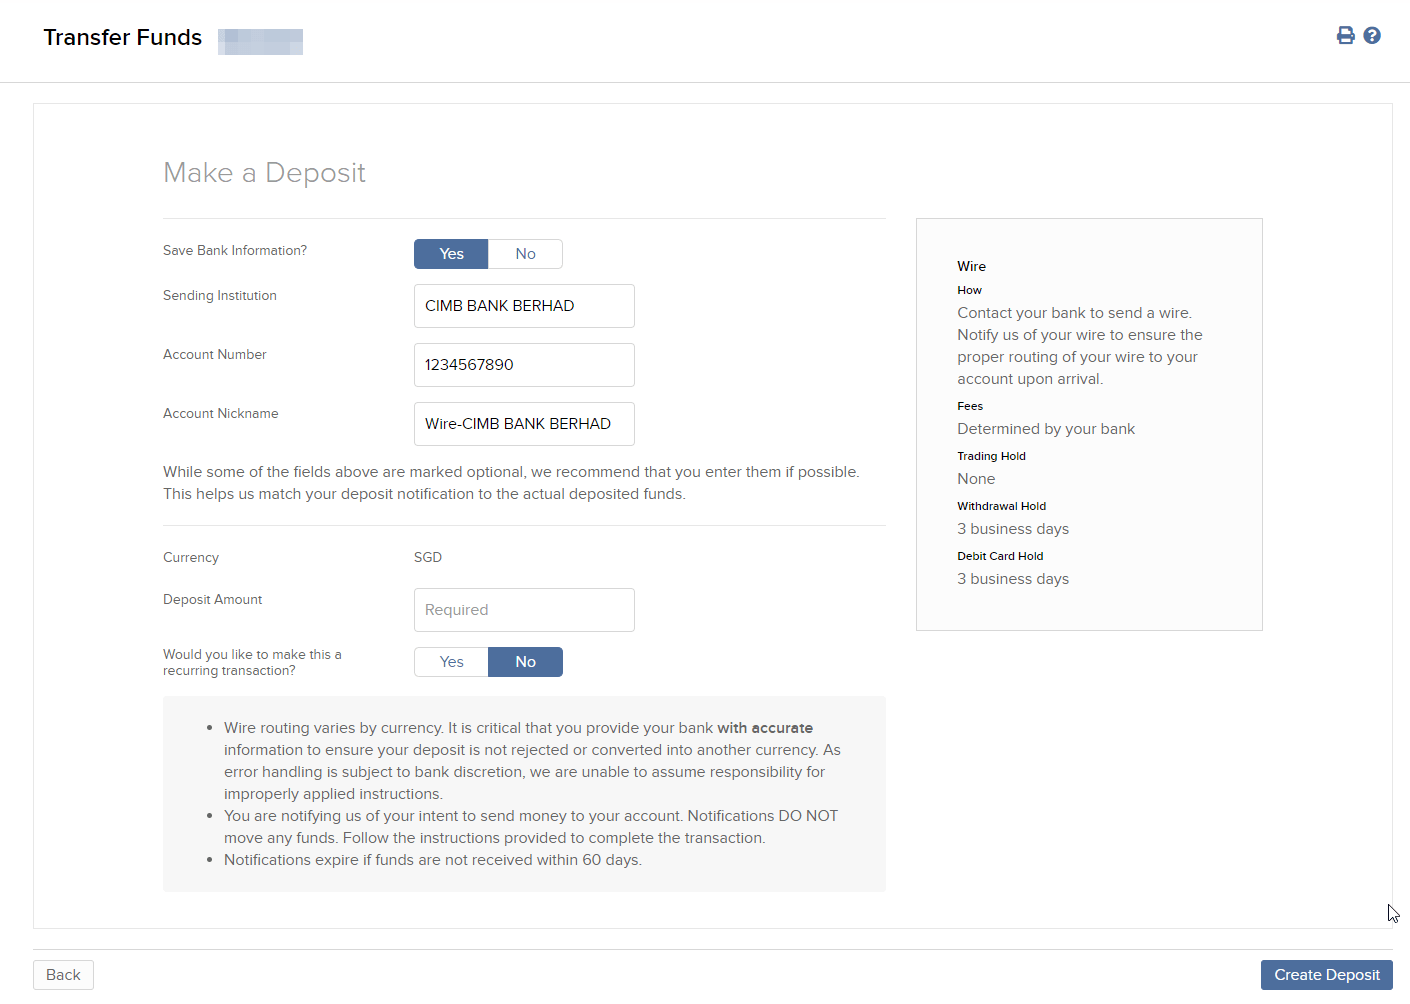
Once you have confirmed the details, a confirmation page will be shown alongside with instructions to perform the transfer. Never share the account details with anyone - as these are virtual accounts generated for you to perform the fund-in.
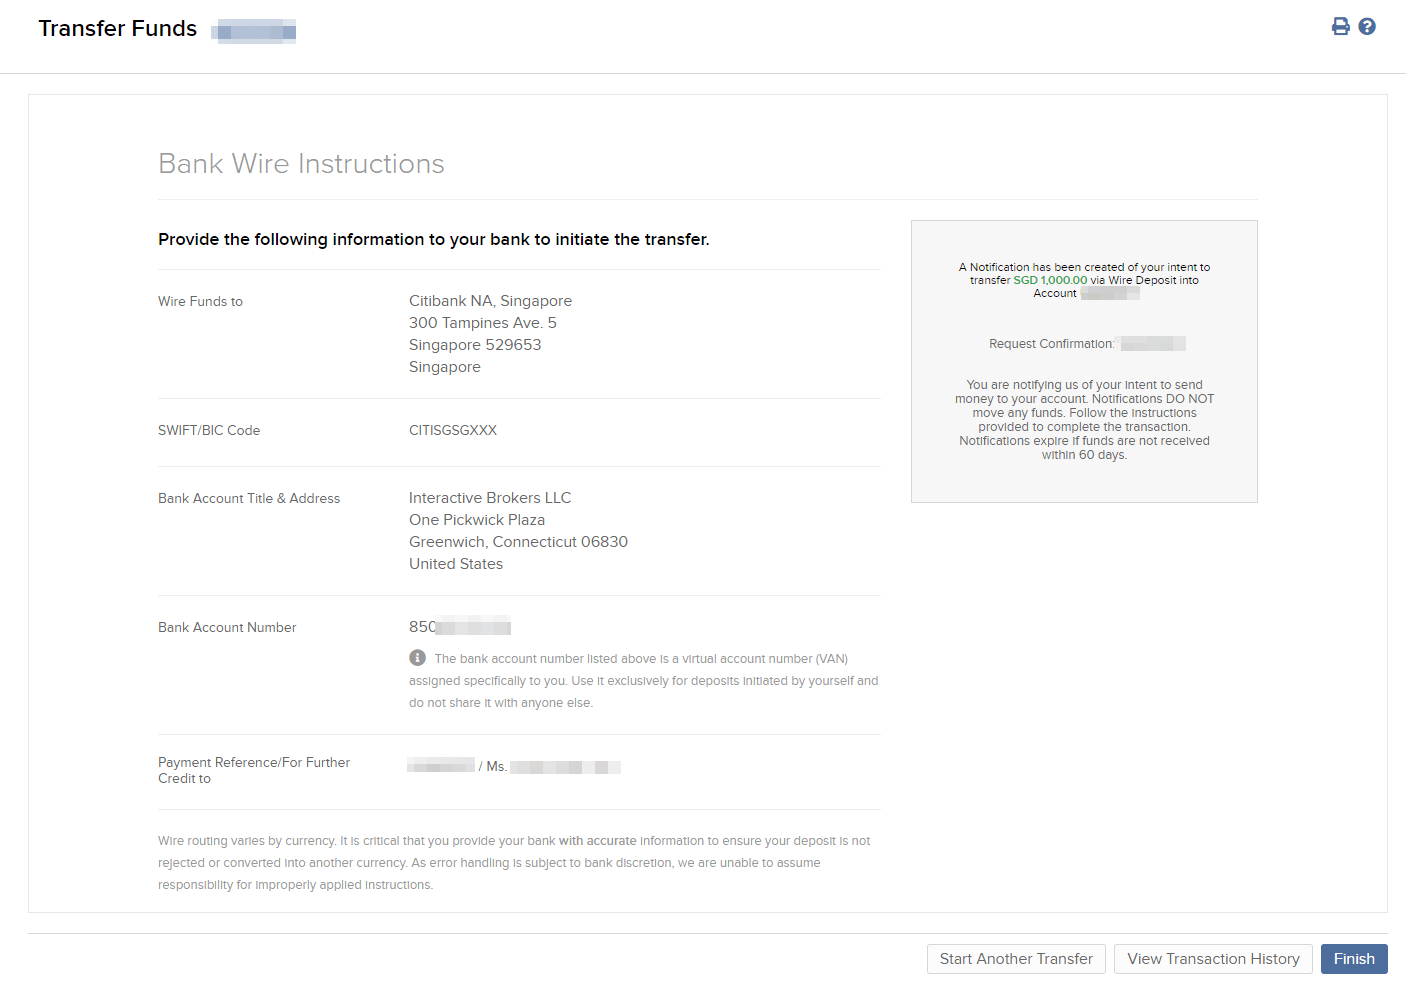
With the recipient bank details, you can now perform the transfer using one of the 3 methods mentioned above. In my case, I went with method 3 where I first converted my MYR into SGD from my Malaysia bank account to CIMB Singapore account (via TransferWise) and subsequently initiated a local FAST transfer within Singapore
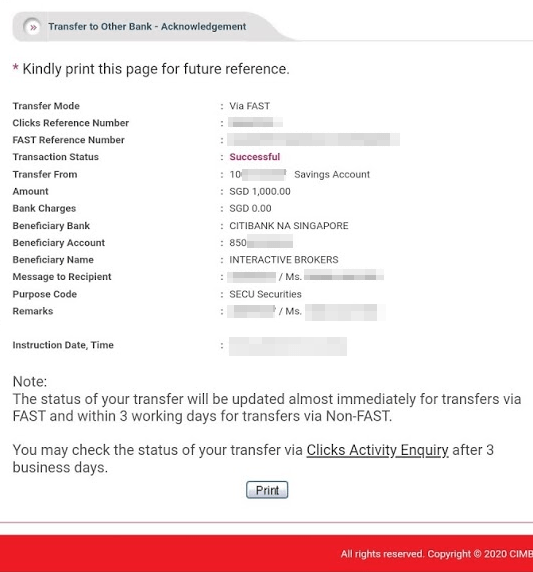
Once the transfer is completed, you may check back on your "Transaction History" to check on the funding process. From my experiences in the past 1 month, the transfer generally takes within 1 - 2 working hours to reflect and you can typically start performing trades within the same day. Unless if your funds are withheld for future verification/audit checks, typically the case if you perform transfer under third party names (e.g. Method 2)
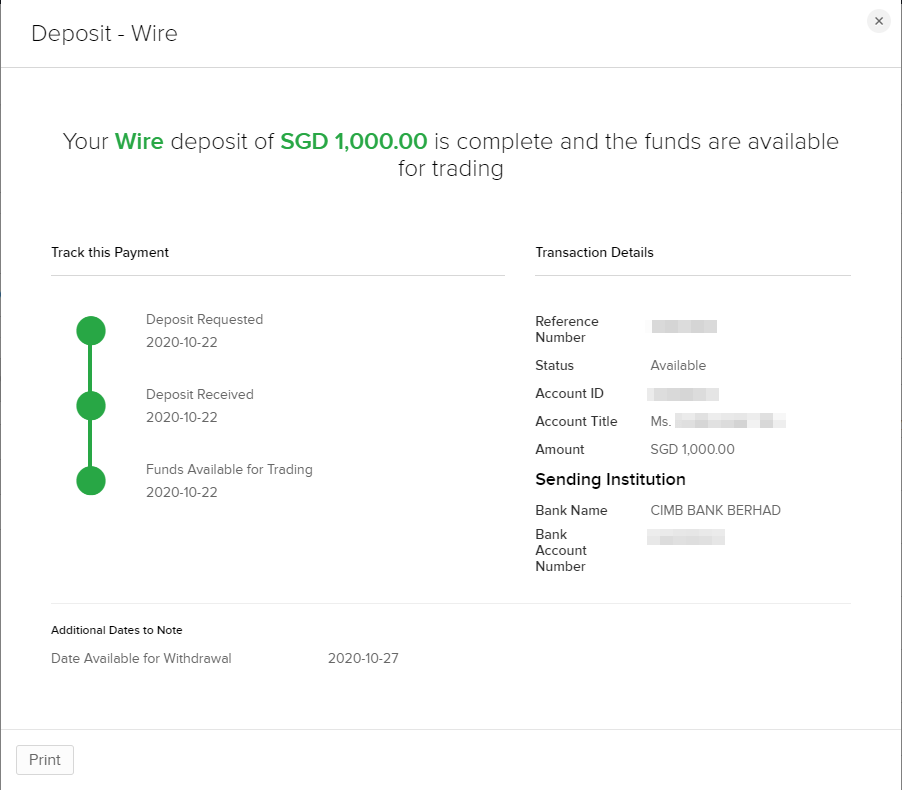
That's it! With the funds made available you can now proceed to trade within Interactive Brokers in whatever currency you have deposited (e.g. SGD in my above example)
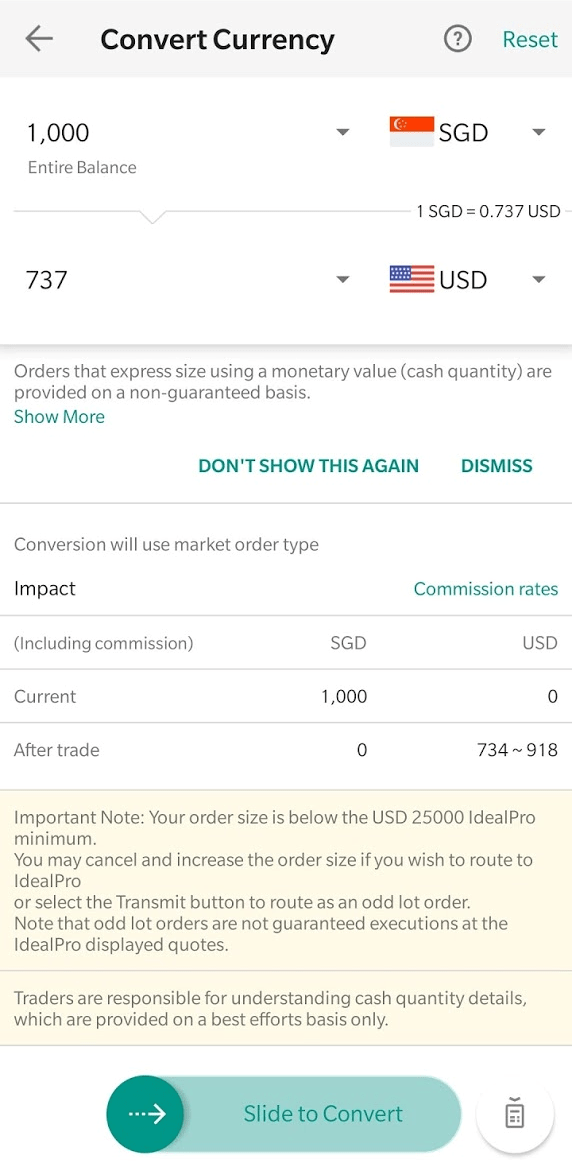
You can hold up to 26+ different currencies in Interactive Brokers, which was one of their strong selling point of dominant international presences. When you initiate a fund-in process, IBKR will store the amount you have transferred in its original currency.
In above example, I have transferred 1000 SGD from Singapore Offshore account and IBKR held exactly the same amount in the same currency. Hence, if I need to purchase equities from US Stock Exchange (USD) or London Stock Exchange (GBP/GBp), I will have to perform an additional step of spot-rate currency exchange within IBKR itself (with commissions).
In case if you are worried that this "double currency conversion" will cost you more, don't worry. The amount is negligible thanks to IBKR's competitive spot exchange rates. I did a quick comparison sometime back in November and the differences are typically in the ranges of -USD0.5 ~ +USD2.5. These are really only negligible differences on amount you're getting between Method 2 vs. Method 3 of transfer methods.
To start the currency conversion within IBKR, just login to Interactive Brokers and select Convert Currency from the burger menu.
Select the currency you currently own and convert it to your target currency, which will be used to purchase stocks / funds.
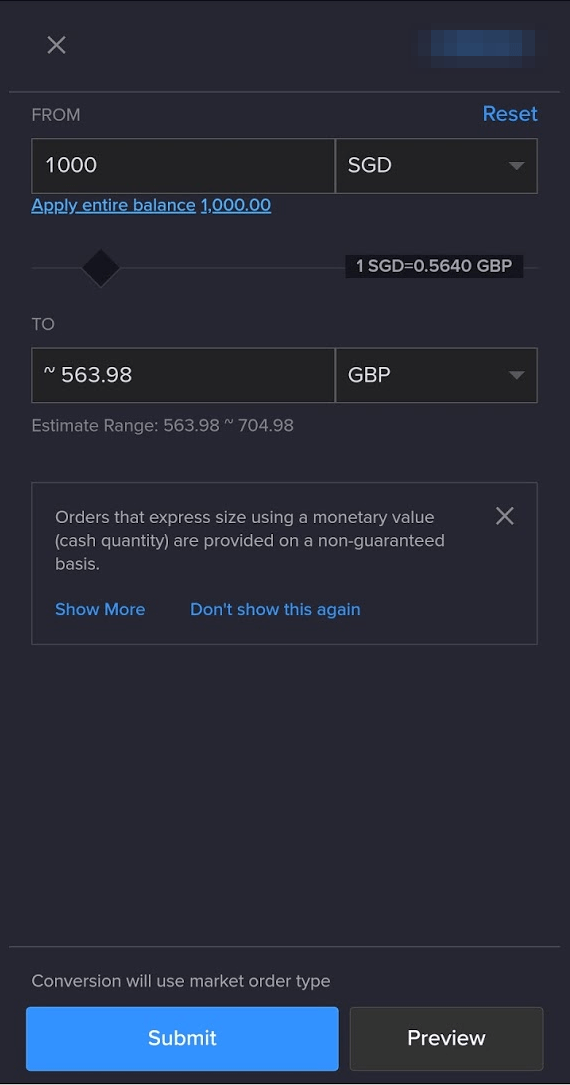
Once confirmed, just submit the order and it will usually take a few seconds or minutes to fill-up the currency exchange order.
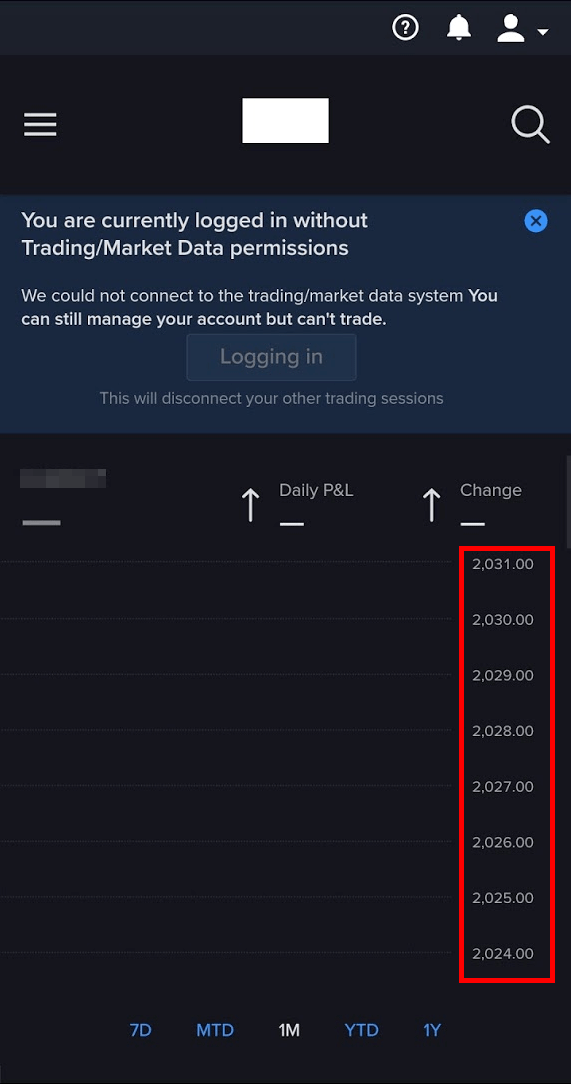
In case if you get some error message like "Your order is not accepted. There is insufficient cash [-2.00 USD] in your account to obtain the desired position." like below:
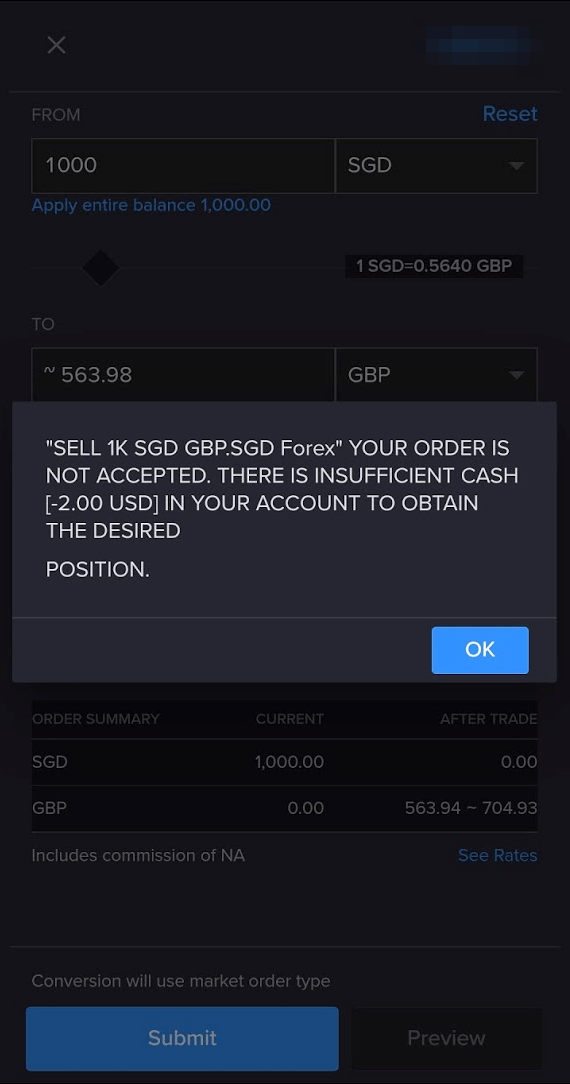
It typically means that your Base Currency do not have the sufficient amounts required to cover the FOREX commissions. So make sure to always fund your base currency first before anything else. I solved mine by first converting my SGD into USD to purchase my first set of stocks/funds, and left some USD for future FOREX commissions.
That's about it! Your account is fully funded, exchanged with the right currency which you want to trade in.
Of the entire post today - this is probably the easiest step - as easy as A,B,C.
First, find your favourite stock ticker that you'd like to buy
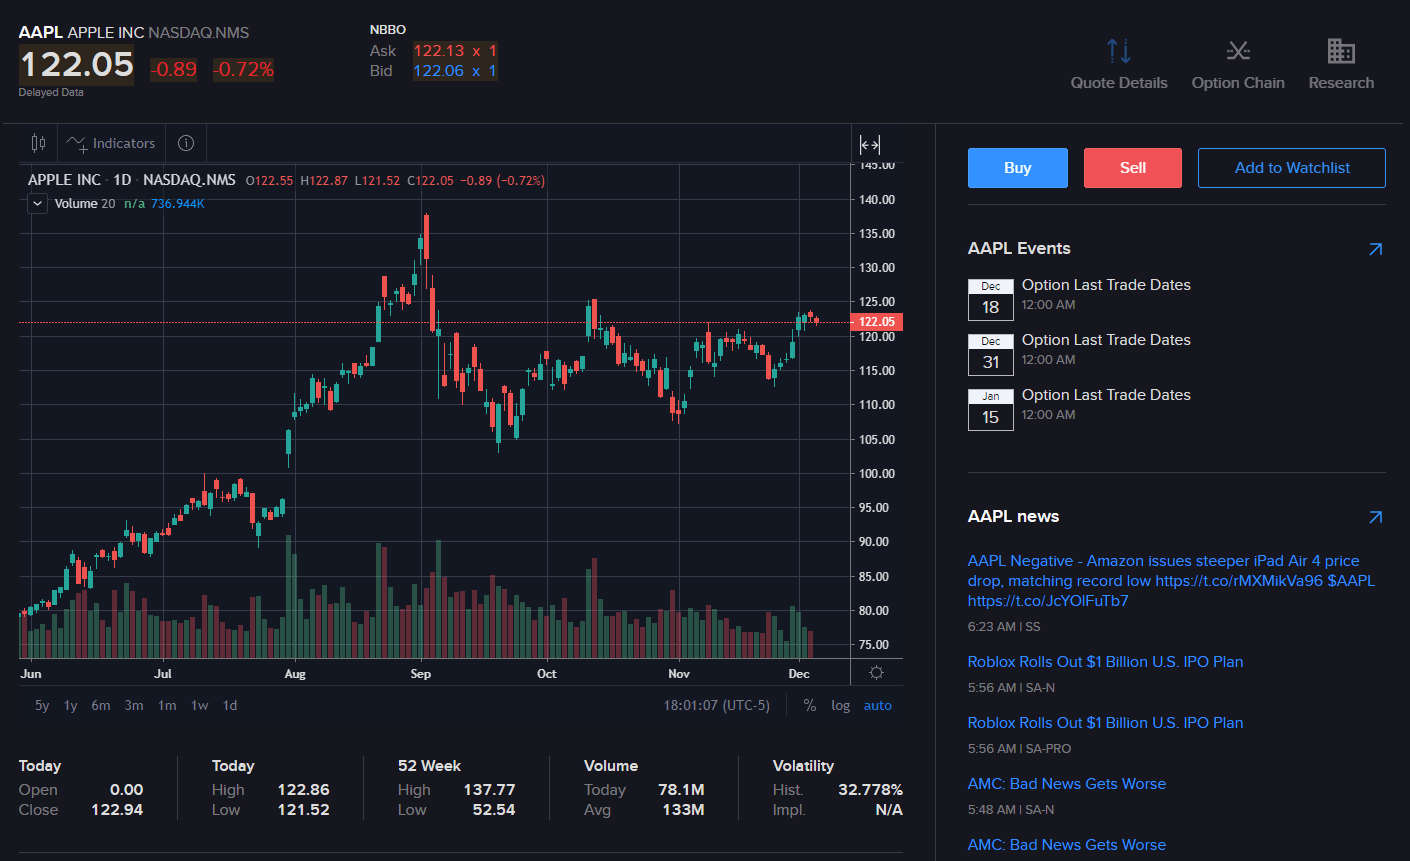
Second, set your trading parameters such as Order Type (Limit / Market order), quantity and price. There's also option to set the order's validity (Day / Good till Cancel).
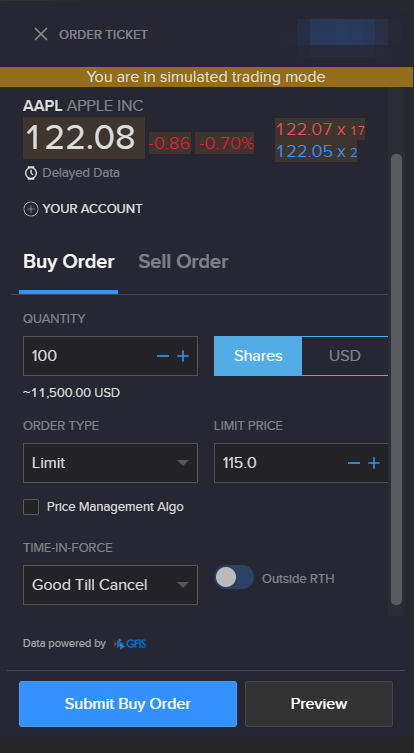
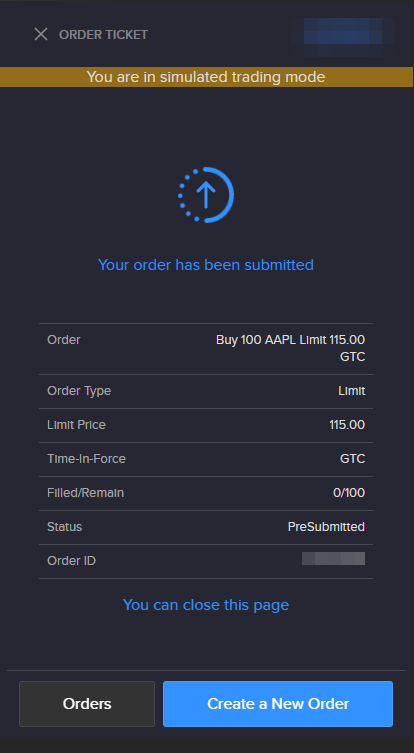
Submit and wait for order to be filled!
Obviously this is over-simplifying the advanced features that Interactive Brokers can offer on their latest Web Client, Mobile Application, and Desktop Application. In essence of time, I'll skip those for now and share more of it in my future postings.
I hope this guide have been helpful in your journey to get started with opening an international trading account, tapping into the power of Interactive Brokers with minimum holdings / fees via TradeStation Global. Personally I am very thankful to come across TSG-IBKR as their fees are really competitive, compared to local brokers both in Malaysia and Hong Kong.
In the future, I will be diving more into the process of using TradeStation Global / Interactive Brokers to provide more in-depth insights and guides based on my trading experience so far.
Thanks for reading and I will see you again in my next post! If you haven't already, be sure to follow me on my Instagram, Facebook and YouTube for latest updates!
Cheers,
Gracie